 |
This article has not been revised for the current version (U51-600112). It was last updated for QLM1-298560. It may contain inaccuracies. |
The Self-Sustainable Bathroom
This Guide will show you how to create a self-sustainable bathroom system — a bathroom that does not require any fresh water and will run indefinitely, actually producing more water over time.
What will you need[ | ]
- Researched Plumbing (For bridges, pumps and vents)
- Researched Sanitation (For Lavatories, Sinks and Showers)
- Researched Distillation (For Water Sieves)
- A way to manage temperature:
- Researched Improved Plumbing (For Insulated Liquid Pipes), as well as either Brute-Force Refinement (For Kilns and Ceramic).
- Alternatively, research Interior Decor and use Wheezeworts in Flower Pots.
How to[ | ]

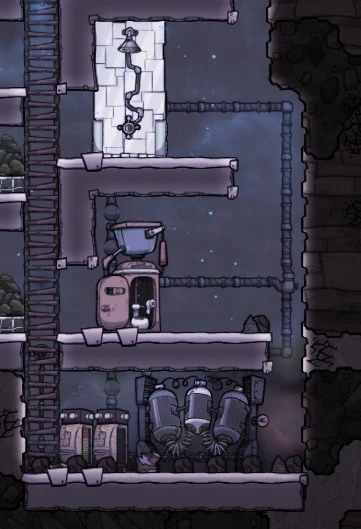
- Build the bathroom with Sinks, Showers and Lavatories.
- Build a separate room nearby for the Water Sieve and some Storage Compactors to put the Filtration Medium (Sand/Regolith) near the filter. Keeping sand near the sieve will allow automation with an Auto-Sweeper later as well as just reducing Duplicant travel distance.
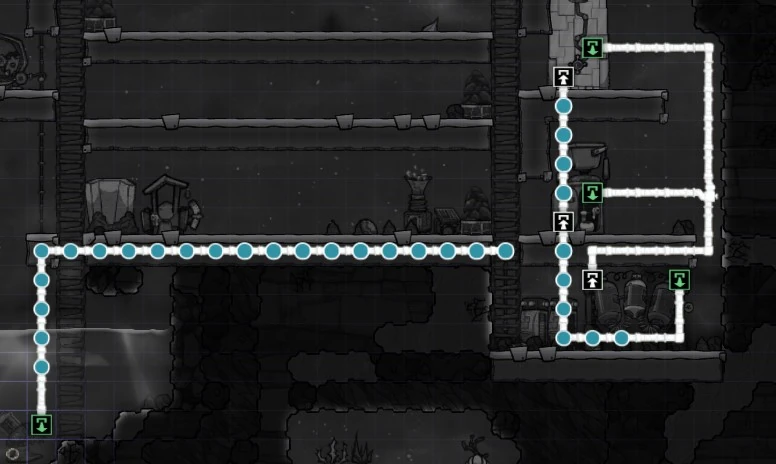
- Construct the pipe network for the bathroom. You'll generally want to run input pipes in one direction (e.g. through the floor) and the output pipes in the other direction (through the ceiling). DO NOT RUN OUTPUT PIPES IN A STRAIGHT LINE THROUGH MULTIPLE OUTPUT (GREEN) PORTS. Outputs only work if the pipe segment connected to that output is completely empty, even if there is only 1kg of liquid, your buildings will block each other so only one Lavatory, Shower or Sink can be used at a time in the entire room if you do that. The pipe network can be built in one of 2 styles:
- Use Insulated Liquid Pipe made of Ceramic.
- Use regular pipes made of whatever (low Thermal Conductivity is better) and put some Wheezeworts in the room to absorb the heat leaking out of the pipes.
- Construct a Water Sieve in your "utility" room that you prepared and connect the output line of your bathroom to the input of the sieve. (Continue using insulated pipe if that is what you're doing)
- Construct a Liquid Pump in your water source if you haven't done that already. Connect the pump to your bathroom's input side. This is temporary and will be deconstructed later.
- Wait for the pump to fill up your bathroom's clean water pipes completely – wait until the water stops moving basically.
- Deconstruct the pipes leading from the pump to the bathroom.
- Connect the output of your Water Sieve to the input line of the bathroom (use insulated pipe if that's what you're doing).


This is the basic loop completed; however, the lavatories will produce more Polluted Water than they consume in Water causing the system to eventually back-up and stop so we need an "overflow valve" to release the excess water from the system.
Final Step[ | ]
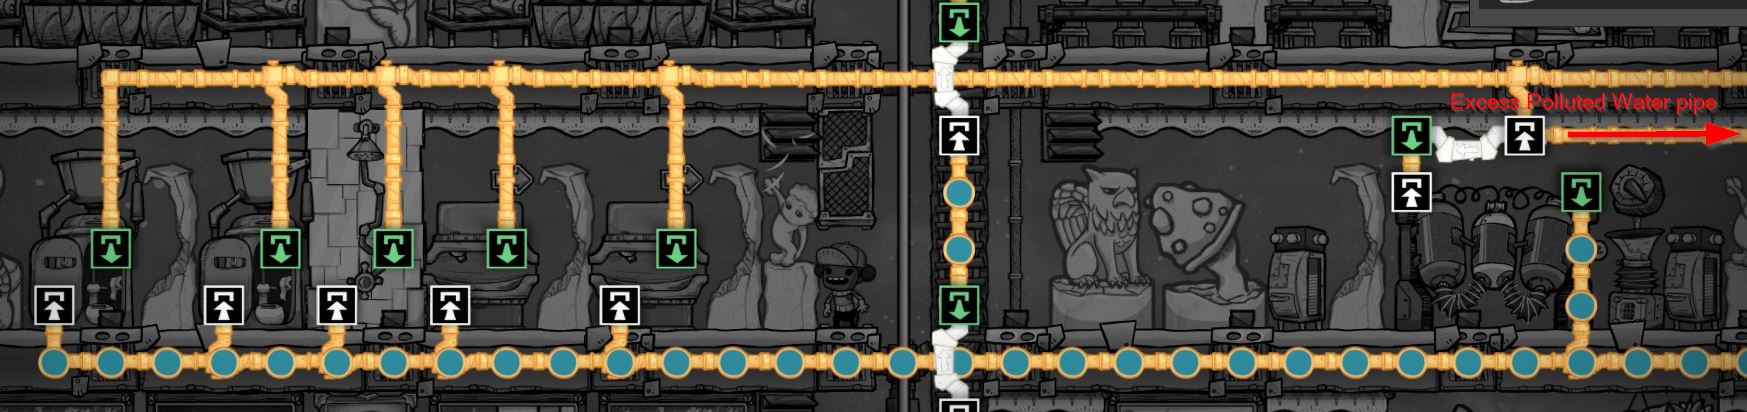
The bathroom is now technically functional but you will need to siphon off the excess Water or Polluted Water depending on which one you can find a use for. The trick to this is using a Liquid Bridge to create a "relief valve". When liquid in a pipe reaches the input of a bridge, it will try to go through the bridge to the other side, but if it cannot because the other side is blocked then the liquid will flow past the bridge's input and continue onwards to the next input port on the pipe.
- Decide if you want to siphon Water or Polluted Water and use the Pliers tool to de-connect or deconstruct 1 pipe segment as close to the Water Sieve as possible (but not directly on top of it since input/output ports can't overlap reliably).
- Replace the missing pipe segment with a Liquid Bridge.
- Drag off a new section of pipe from the input (white) port of the bridge (must be from the bridge's input exactly, not before it) and connect that new pipe segment to wherever you want it to go (e.g. to a Liquid Vent in an overflow tank).
Your bathroom will now run forever as long as you supply it with Filtration Medium, and it will slowly produce additional water over time in your overflow tank.
WARNING: The "clean" Water that comes out of the Water Sieve still has germs in it so do not allow your Duplicants to consume the bathroom water in the Microbe Musher, Water Cooler or Espresso Machine. The overflow Polluted water should only be used for growing Thimble Reed. (Germs are passed to food from plants in the current build of the game at this time of writing.)
Limitations[ | ]
This design implicitly relies on the fact that bathrooms are used sporadically rather than continuously. A Water Sieve can only process 5kg of Polluted Water per second, so if you put 10 Showers on one pipe then the sieve might not be able to keep up and you would need a second sieve or a longer pipe snake to buffer more clean water. Also keep in mind that pipes can only hold a maximum of 10kg of liquid per bubble so 11 showers on one pipe could block the output of each other causing one of them to stop working.
Risks[ | ]
There is, of course, the matter of the ever-present germs in the water that is being recirculated, because this loop does not contain any disinfection process. This can be a serious impediment if you attempt to remodel your colony and the loop is in the way.